On June 2023, I made a fuse box with custom PCB. The rear light on/off operates a power relay which switches power from battery to output connections:
The enclosure was 3D printed (Ultimaker 3, PLA) and also holds Ruthex brass inserts (you melt them in).
Worfje's Timeline 5th Gen
-
Worfje
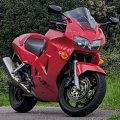
- Posts: 104
- Joined: Fri May 29, 2026 10:28 pm
- Location: Netherlands
- Has liked: 123 times
- Reiceved a like: 83 times
Re: Worfje's Timeline 5th Gen
You do not have the required permissions to view the files attached to this post.
-
Worfje
- Posts: 104
- Joined: Fri May 29, 2026 10:28 pm
- Location: Netherlands
- Has liked: 123 times
- Reiceved a like: 83 times
April 2023, I installed a VDO voltmeter (332-010-001K):
I don't prefer 'damaging' the original tupperware, but made an exception.
In hindsight, it is a bit hard to see the dial when riding and the dial doesn't move back to zero volt due to orientation of dial.
I don't prefer 'damaging' the original tupperware, but made an exception.
In hindsight, it is a bit hard to see the dial when riding and the dial doesn't move back to zero volt due to orientation of dial.
You do not have the required permissions to view the files attached to this post.
-
Worfje
- Posts: 104
- Joined: Fri May 29, 2026 10:28 pm
- Location: Netherlands
- Has liked: 123 times
- Reiceved a like: 83 times
June 2023, I finally hit (adding) 100000 km (just a bit over 62000 miles) after having bought the bike with 25000 km:
This achievement allowed me getting the prestigious membership of the 'VFR 100000 Bikkel Club'.
This achievement allowed me getting the prestigious membership of the 'VFR 100000 Bikkel Club'.
You do not have the required permissions to view the files attached to this post.
-
Worfje
- Posts: 104
- Joined: Fri May 29, 2026 10:28 pm
- Location: Netherlands
- Has liked: 123 times
- Reiceved a like: 83 times
After running my chain completely dry (I felt something in the drivetrain after a wet weekend in Germany) and having it 'emergency sprayed' in with WD40 supplied by road assistance given by 'Rijkswaterstaat', I felt the need to replace it.
A nice opportunity to get the most beefy that would fit from D.I.D., namely 530ZVM-X2. The 530VX3 would have been a more rational choice (weight / efficiency). A front sprocket with less teeth from JT (JTF339RB, 17 teeth) and rear also from JT (JTR1340, 45 teeth, same as original). This allows some higher acceleration at the expensive of top speed, but who the helly can legally run at 220 km/h (137 miles/h)?
Always wanted to see how the rubbers were doing in the rear wheel hub. Much intact, probably stiffened up due to age. Anyways, replaced them with new.
A nice opportunity to get the most beefy that would fit from D.I.D., namely 530ZVM-X2. The 530VX3 would have been a more rational choice (weight / efficiency). A front sprocket with less teeth from JT (JTF339RB, 17 teeth) and rear also from JT (JTR1340, 45 teeth, same as original). This allows some higher acceleration at the expensive of top speed, but who the helly can legally run at 220 km/h (137 miles/h)?
Always wanted to see how the rubbers were doing in the rear wheel hub. Much intact, probably stiffened up due to age. Anyways, replaced them with new.
You do not have the required permissions to view the files attached to this post.
-
Worfje
- Posts: 104
- Joined: Fri May 29, 2026 10:28 pm
- Location: Netherlands
- Has liked: 123 times
- Reiceved a like: 83 times
Having the swing arm off, was a good opportunity to replace the 'by brake cleaner supersized' rear brake caliper slide rod shaft boot gaiters:
Personally, I love the 'gold' chain color. Using an angle grinder, I split the old chain.
The new chain needs to be closed using a chain riveter. Not too deep and not too shallow (not stating I did it perfect here).
Personally, I love the 'gold' chain color. Using an angle grinder, I split the old chain.
The new chain needs to be closed using a chain riveter. Not too deep and not too shallow (not stating I did it perfect here).
You do not have the required permissions to view the files attached to this post.
-
Worfje
- Posts: 104
- Joined: Fri May 29, 2026 10:28 pm
- Location: Netherlands
- Has liked: 123 times
- Reiceved a like: 83 times
Unfortunately, on October 2023 while returning home voltage dropped to 0 volt:
When the voltage dial was showing 0 volt, the engine was still running, but it wasn't long before the exhaust started 'popping' and loss of power could be felt. I turn off the engine and freewheeled to the luckily nearby highway exit.
Road assistance was very friendly and dropped me and the bike at my doorstep.
My first guess was the alternator, but after some investigation it was the result of below: Still not sure what had caused the overheating of the 30A fuse from the Eastern Beaver cable kit, I did some measurements on the alternator and regulator/rectifier. The measurements looked fine. I did change a lot on the electrics around August 2023 (moved from original VFR800 regulator/rectifier (RR) to SH847AA, connected RR directly to battery, added a custom fuse box and removed Xenon headlights back to original halogen).
I informed Eastern Beaver and they noted that the fuse must have been running near 30A (or just a little over 30A) for a longer time period (since the black / melted plastic, instead of just a big power surge which would only melt the metal part of the fuse in case of a electrical shortcut).
When the voltage dial was showing 0 volt, the engine was still running, but it wasn't long before the exhaust started 'popping' and loss of power could be felt. I turn off the engine and freewheeled to the luckily nearby highway exit.
Road assistance was very friendly and dropped me and the bike at my doorstep.
My first guess was the alternator, but after some investigation it was the result of below: Still not sure what had caused the overheating of the 30A fuse from the Eastern Beaver cable kit, I did some measurements on the alternator and regulator/rectifier. The measurements looked fine. I did change a lot on the electrics around August 2023 (moved from original VFR800 regulator/rectifier (RR) to SH847AA, connected RR directly to battery, added a custom fuse box and removed Xenon headlights back to original halogen).
I informed Eastern Beaver and they noted that the fuse must have been running near 30A (or just a little over 30A) for a longer time period (since the black / melted plastic, instead of just a big power surge which would only melt the metal part of the fuse in case of a electrical shortcut).
You do not have the required permissions to view the files attached to this post.
-
Worfje
- Posts: 104
- Joined: Fri May 29, 2026 10:28 pm
- Location: Netherlands
- Has liked: 123 times
- Reiceved a like: 83 times
Both Eastern Beaver and I were puzzled on why/how the my bike would draw so much current for a longer time frame (longer meaning roughly more than 5 minutes, enabling heat up to above roughly 350°C).
As posted earlier, I did add a custom device for enabling safety light and changed back to halogen head lights (to circumvent possible issues in Germany). It triggered me to make a overview of the power usage and I had a look at the electrical schematic.
Original schematic: VFR800-FIW: Schematic after installing 'RR directly onto battery': For me this explained why the 30A fuse melted/blew in case of 'RR directly onto battery': all current directly consumed and charging the battery must pass the added 30A fuse near the RR, which wasn't the case with the original electrical layout.
In the original electrical layout, the RR provides electrical power parallel to the 'direct consumers' and the battery (if in need of charging) via the main fuse B of 30A.
The fact that the 'main fuse (B)' was fine / did not melt supports that additional current was drawn to charge the battery during the build up to failure. Namely, if the current draw was mainly from the 'direct consumers' the 'main fuse (B)' of 30A should also have melted.
The VFR800FIW stator is specified to deliver 470 W but at 5000 rpm, giving 34 A @ 14 V.
Before the moment of failure, I spend about 20 minutes motorcycling through a traffic jam (allowed in the Netherlands) and ran my hazard lights at low RPM (draining the battery). I cleared the traffic jam and RPM got up to 5000 and for roughly 20 minutes the battery was charging (hazard lights disabled).
My situation (VFR800 + added hazard lights) could be considered unique due to the additional load of the hazard lights device. Anyways, I changed back to the original schematic and did run error free ever since (I did upgrade the connector set that connects the RR to the main wiring harness).
As posted earlier, I did add a custom device for enabling safety light and changed back to halogen head lights (to circumvent possible issues in Germany). It triggered me to make a overview of the power usage and I had a look at the electrical schematic.
Original schematic: VFR800-FIW: Schematic after installing 'RR directly onto battery': For me this explained why the 30A fuse melted/blew in case of 'RR directly onto battery': all current directly consumed and charging the battery must pass the added 30A fuse near the RR, which wasn't the case with the original electrical layout.
In the original electrical layout, the RR provides electrical power parallel to the 'direct consumers' and the battery (if in need of charging) via the main fuse B of 30A.
The fact that the 'main fuse (B)' was fine / did not melt supports that additional current was drawn to charge the battery during the build up to failure. Namely, if the current draw was mainly from the 'direct consumers' the 'main fuse (B)' of 30A should also have melted.
The VFR800FIW stator is specified to deliver 470 W but at 5000 rpm, giving 34 A @ 14 V.
Before the moment of failure, I spend about 20 minutes motorcycling through a traffic jam (allowed in the Netherlands) and ran my hazard lights at low RPM (draining the battery). I cleared the traffic jam and RPM got up to 5000 and for roughly 20 minutes the battery was charging (hazard lights disabled).
My situation (VFR800 + added hazard lights) could be considered unique due to the additional load of the hazard lights device. Anyways, I changed back to the original schematic and did run error free ever since (I did upgrade the connector set that connects the RR to the main wiring harness).
You do not have the required permissions to view the files attached to this post.
-
Worfje
- Posts: 104
- Joined: Fri May 29, 2026 10:28 pm
- Location: Netherlands
- Has liked: 123 times
- Reiceved a like: 83 times
Around April 2024, I bought a heatshield from eBay, since mine always had an extra / unoriginal hole in it for some reason.
The heatshield from eBay was sandblasted and powder coated in a RAL color (I don't recall which one):
The heatshield from eBay was sandblasted and powder coated in a RAL color (I don't recall which one):
You do not have the required permissions to view the files attached to this post.
-
Worfje
- Posts: 104
- Joined: Fri May 29, 2026 10:28 pm
- Location: Netherlands
- Has liked: 123 times
- Reiceved a like: 83 times
March 2024, I looked into moving the rear suspension canister which allows compression adjustment from inside the bodywork (the default) to the outside.
At default position, the effort required for reaching the adjuster really limits the will to play with its setting. Next to that, at default position, the outside of the tube connecting the canister to the shock looked a bit crispy: I asked for a longer tube (don't recall original and chosen length), but I needed a solution for the reducing the heat that can reach the tube: Applied was a titanium heat wrap of 25 mm wide which was claimed to be suitable up to 1400 °C in combination with a RVS 'ball lock' cable tie.
I had some difficulty with the ball lock cable ties. The ball always moves a bit 'back' resulting in a slack when you think you were done with the cable tie. I tricked the mechanism, by pushing the ball with a thick needle. The canister fitted pretty well above the preload adjuster, but required a custom bracket:
At default position, the effort required for reaching the adjuster really limits the will to play with its setting. Next to that, at default position, the outside of the tube connecting the canister to the shock looked a bit crispy: I asked for a longer tube (don't recall original and chosen length), but I needed a solution for the reducing the heat that can reach the tube: Applied was a titanium heat wrap of 25 mm wide which was claimed to be suitable up to 1400 °C in combination with a RVS 'ball lock' cable tie.
I had some difficulty with the ball lock cable ties. The ball always moves a bit 'back' resulting in a slack when you think you were done with the cable tie. I tricked the mechanism, by pushing the ball with a thick needle. The canister fitted pretty well above the preload adjuster, but required a custom bracket:
You do not have the required permissions to view the files attached to this post.