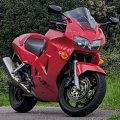
Worfje's Timeline 5th Gen

Tell us your story, modifications, repairs, experiences, ...
User avatar
Worfje
Posts: 98
Joined: Fri May 29, 2026 10:28 pm
Location: Netherlands
Has liked: 105 times
Reiceved a like: 74 times

Re: Worfje's Timeline 5th Gen

Post by Worfje »

A big jump in time forward, I still have to find pictures I made between 2010 and 2022.
I recall that roughly between 2016 and 2021 the bike wasn't used much.
Probably due carpooling to work and having less time due to becoming a parent.
With having a kid, the vulnerability of riding a bike came more into mind.
At some point in time, the oil came out as clean as I put it in... and also I got sloppy with servicing the bike.

Focus shifted to upgrading multiple Volkswagen Passat 3BG/B5. Highest achievement was a TDI 4Motion upgraded from stock 140 hp to 213 hp using a improved turbo and intercooler (Darkside Developments). Alas, the engine gave up and after I swapped it I got oil in the cooling fluid and it was time to move on (car was from 2005 and getting outdated).

The kids getting much older (me getting more time), carpool died due to covid (much more working from home allowed) resulted in more riding the bike. My sloppy service resulted in: brakes were far from optimal and the fork tube were showing some corrosion / leakage. So, I started with getting it back in shape. One of the things I did around March 2022 was checking the valve clearances:
IMG_20220326_121512_smaller.jpg
IMG_20220326_121459_smaller.jpg
I always wondered if this would be considered normal wearing marks on a cam?

Around 2023, a nephew bought his first bike and this relighted the fire completely. 8-)
It also helped that we had some more money coming in (kids not at daycare anymore and growth of salary due to experience / positive appraisals.
You do not have the required permissions to view the files attached to this post.
User avatar
Worfje
Posts: 98
Joined: Fri May 29, 2026 10:28 pm
Location: Netherlands
Has liked: 105 times
Reiceved a like: 74 times

Post by Worfje »

April 2022 a PAIR Valve Removal Kit from SmartMoto (BLP-106) was purchased / placed:
IMG_20220401_135902_smaller.jpg
(picture showing pair valves with original lid removed)

This also allows to remove the PAIR control solenoid and its connected tubing (saving some weight and complexity).
You do not have the required permissions to view the files attached to this post.
User avatar
Worfje
Posts: 98
Joined: Fri May 29, 2026 10:28 pm
Location: Netherlands
Has liked: 105 times
Reiceved a like: 74 times

Post by Worfje »

Time for a new steering head bearing set.
Switched back to original ball bearing.
I did 'upgrade' to cone / cylinder shaped in the past.
What are your experiences with cone vs. ball?
IMG_20220407_203021_smaller.jpg


I always found it a pita to remove the part of the bearing that snugs onto the bottom yoke.
Which method / tooling are you using for this?
You do not have the required permissions to view the files attached to this post.
User avatar
Worfje
Posts: 98
Joined: Fri May 29, 2026 10:28 pm
Location: Netherlands
Has liked: 105 times
Reiceved a like: 74 times

Post by Worfje »

The paint of the letters around the ignition switch were very poor readable and I gave them fresh paint (just some white primer).
Just apply some paint onto the surface and then you wiped 'over' it and due to the cavity of each letter it magically works out great (April 2022):
IMG_20220419_184526_smaller.jpg
You do not have the required permissions to view the files attached to this post.
User avatar
JZH
Posts: 28
Joined: Mon Jun 01, 2026 3:06 pm
Location: Leiden, NL/London, UK
Has liked: 30 times
Reiceved a like: 39 times
Contact:

Post by JZH »

Removing the lower inner bearing race is always fun. In the old days, I would take advantage of the fact that we used separate seals under the bearing race (like yours, above), which allowed me to create a tiny gap between the race and the lower yoke if I first terminated that seal (with extreme prejudice). That tiny gap was ruthlessly exploited with various cold chisels and abused flat-head screwdrivers until the race began to move. Many hours and much coarse language later, I could usually get the race off with only minor, polish-outable damage to the steering stem.

These days I just Dremel(R) through it! The catch is that it is very easy to nick and damage the steering stem if you slip or cut too far, but I've found that you can crack the race nicely if you cut most of the way through it and then give a few sharp taps onto a flat-blade screwdriver wedged into the new vertical gap you've just cut. The cracked race can then simply be lifted off the stem by turning the screwdriver slightly as you lift.

Ciao,

JZH
Leiden, NL/London, UK
www.vsource.org
RS250; SXV550; CBR250RRR; CBR400RRN; RVF400RT; VFR400RL; VFR400RN; VFR750FL; VFR800FiY; VFR800Fi1; VFR750FP; ST1300A4 (and counting...)

"After all, what is a motorcycle for if it isn't action?"
mello dude
Posts: 52
Joined: Mon Jun 01, 2026 6:38 pm
Has liked: 80 times
Reiceved a like: 75 times

Post by mello dude »

Worfje wrote: Wed Aug 05, 2026 4:27 pm April 2022 a PAIR Valve Removal Kit from SmartMoto (BLP-106) was purchased / placed:

IMG_20220401_135902_smaller.jpg
(picture showing pair valves with original lid removed)

This also allows to remove the PAIR control solenoid and its connected tubing (saving some weight and complexity).
Dunno if you made the note from VFRD....but notes..if you dont remove the reed valve and fasteners, it will hit the block off plate and not seal up.
I used to sell block off plates.....I did a whole spiel on installation....
* There's someone in my head, but it's not me
* Mr. Murphy was an optimist
* My get up and go, must have got up and went
* Half genius, half dumazz whackjob foole
* "mello dude" Sometimes its truth, sometimes its sarcasm
User avatar
Worfje
Posts: 98
Joined: Fri May 29, 2026 10:28 pm
Location: Netherlands
Has liked: 105 times
Reiceved a like: 74 times

Post by Worfje »

mello dude wrote: Wed Aug 05, 2026 8:33 pm Dunno if you made the note from VFRD....but notes..if you dont remove the reed valve and fasteners, it will hit the block off plate and not seal up.
I used to sell block off plates.....I did a whole spiel on installation....
Thanks for the note... euhm tip!

The plates from SmartMoto have two cavities that I assume allow to leave the reed valves and fasteners in place:
smartmoto_block_off.jpg
Still, removing them would save weight! :)
You do not have the required permissions to view the files attached to this post.
User avatar
Worfje
Posts: 98
Joined: Fri May 29, 2026 10:28 pm
Location: Netherlands
Has liked: 105 times
Reiceved a like: 74 times

Post by Worfje »

Decided that the fork tubes needed a proper revision (and not just sanding off the pitting every once in a while) at April 2022.
A Dutch motor forum suggested the company 'Hardchrome Wever B.V.'.
One could argue to buy a new set, but at the time I figured it wouldn't come with the thick chrome layer as promised by 'Hardchrome Wever B.V.'.
IMG_20220419_210409_smaller.jpg
You do not have the required permissions to view the files attached to this post.
User avatar
Worfje
Posts: 98
Joined: Fri May 29, 2026 10:28 pm
Location: Netherlands
Has liked: 105 times
Reiceved a like: 74 times

Post by Worfje »

The top yoke and handle bars were powder coated (first black... no I asked for light grey/metallic):
IMG_20220420_182935_smaller.jpg
The picture shows a different color/effect in regard to the (small part shown of the) handle bar, but the handle bar is closer to reality.
I found it nice to see that even the smallest seemingly unimportant parts (the VFR logo) are still available.
Removing the handle bar internal weights and grips took some time / effort.
You do not have the required permissions to view the files attached to this post.
User avatar
Worfje
Posts: 98
Joined: Fri May 29, 2026 10:28 pm
Location: Netherlands
Has liked: 105 times
Reiceved a like: 74 times

Post by Worfje »

On August 2022, I received a kit from Eastern Beaver which allowed a SH847AA (Suzuki part number 3280031J00) rectifier / regulator to be directly connected to the battery:
PXL_20220831_172952692_smaller.jpg

I used an aluminum plate as interface and added some holes / thread to allow mounting (and hopefully helping a bit with 'passive' cooling).
PXL_20220831_183212838_smaller.jpg
I cut of the original connector attached to the wire of the alternator (another achilles). It still looked ok-ish.
PXL_20220831_185200691_smaller.jpg
Being a big fan of crimping on wires (instead of soldering), I applied a set of Metri-Pack 280 connectors.

Please note that I am not in favor of directly connecting the rectifier / regulator to the battery (which will be illustrated later on after events on October 2023).
You do not have the required permissions to view the files attached to this post.
Post Reply